Thursday, 8 October 2015

Air tank inspection

A few readers were worried about the state of the air tanks on an old truck like this - that they may be badly rusted inside and unsafe. So i bought a cheap USB endoscope on fleabay 


I could then inspect the inside of the tanks. The image quality is not great and what makes the camera had to use is that there is a time lag of several seconds for the images displayed on the attached laptop.

It was good enough to see that the innards were not badly corroded - some surface rust and a fair amount of black gunge


Sunday, 13 September 2015

A little more painting

I've been a bit lazy over the winter months but the other day got some more bits painted


Backing plate for the offside front brake


Air tanks


Then I refitted the air tanks


and also the new cab rubbers


Sunday, 9 August 2015

Clutch conversion part 1

I did some work on converting the clutch to include an air servo.

The original clutch mechanism was simply a bar joining the pedal to the release lever and was fiendishly heavy: you had to brace yourself against the seatback to move it. I picked up a new air servo on ebay some time ago; I think it's a Man Diesel part


This servo is operated by hydraulics so the pedal needs to activate a master cylinder instead of the old push rod.

I picked up a master cylinder and clevis from these people carbuildersolutions.com


This has (I think) a bore and stroke that will match the servo.

The original clutch pedal needed bending slightly in the vise and thinning down to accept the clevis. I reamed the hole out to 7/16"


and made a brass bushing for the clevis pin


Quite a milestone actually because it is just about the first successful thing I have made on my lathe!

The spring loaded 'captive' pin for the clevis is a really neat idea: mush easier than messing about with split pins.


So flushed with success I made a steel pushrod complete with 5/16" UNF thread cut on the lathe (woohoo!)


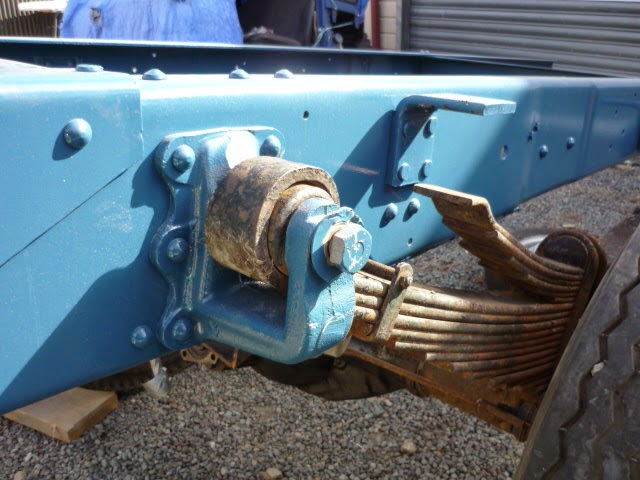
The whole thing sits on the truck like this


I'm not sure that I have the pedal stroke correct but it will be good enough to get started. It's difficult to tell without the cab on and the other pedal fitted and so on.


Saturday, 11 July 2015

Reassemble the n/s front brakes

With a handful of new parts to fit I reassembled the offside front hub and brakes.


New wheel cylinder in place; the original was scored and leaking. One piston was seized and you could see that only one brake shoe was contacting the drum. There is plenty of wear left on the linings so I simply gave them a clean up with a wire brush.

The adjuster mechanisms go through the back plate and are held in place with a double coil washer (I think it's a Thackray washer), a dished washer and a circlip. It sits in a recess in the back plate and I could not get it anywhere near on

I made a special tool on the lathe that would compress the spring and washer while I fed the circlip in from the side

This worked well enough.

Here are the completed brakes and hub


Sunday, 19 April 2015

Footbrake Air Valve

I stripped down the foot-brake air valve.


Inside it looks like this


There are air two chambers one of which was quite clean and the other was full of white powder. The cylinder bore seemed good but then I noticed that it was cracked


so I ordered a new part. Came across one of those strange bits of pricing. A rebuild kit which by me reckoning contains a handful of o-rings and a filter is UKP128. The bit you see in the lower pictures is called a foot-brake 'portion' and is UKP 230 complete with all the internal bits and the entire valve which includes the angle bracket that you see in the first picture is UKP403

It seems that the portion is by far the best buy so I ordered one of those.


Monday, 13 April 2015

Start reassembly


Steering box, steering arm and power steering ram back in place. The power steering ram is non-standard I think; maybe from a Bedford coach. The power steering parts I have seen advertised for TKs have the hydraulic bits built into a larger steering box and no separate ram. Also, the bracket between the ram and the chassis looks fabricated.


Compressor unloader valve.


Tuesday, 7 April 2015

Rolling again

With the chassis painted I was keen to get it all rolling again and move it all under cover for the winter.


The axles had a good wash and went back on. I thought about painting them too but there is really no point. A lot of travelling here in NZ's South Island is on un-sealed roads and everything just gets filthy. I have no intention of climbing under the truck to clean it. The chassis needed a coat of paint to protect it; the axles and springs are not about to rust away.


Rear spring eye bolts are straight into a threaded forging with some loctite and 190 lb/ft torque. Fitting the rear axle was not has difficult as I expected; I used to chocks of wood and simply 'walked' it into place until it all lined up.


The tractor and loader can just pick up one end of the chassis so you can trundle it about like a giant wheel barrow. All safely in the barn for the winter.