Tuesday 26 February 2013

Blasting kit


While my hair is full of sand and the inside of my workshop resembles a beach I thought I might show the equipment I've been using.
This is the pressure pot. It is the standard cheapo Chinese kits that all the discount tool shops seem to be selling. It is not a great tool but it is cheap and it is adequate. This is the smaller of two they had on offer and I think the right choice; it is very heavy when full and one twice the size would be difficult to manage since you have to drag it around the work area. This size give about 30 minutes blasting. The sand is poured in through the red lid on the top. Note that this is the largest opening to the vessel so you really need to be careful not to get any big lumps or foreign objects in there; it would be difficult to get them out again.

The grit destroys everything in its path including the air valves and the ceramic blasting tips. I am blasting with a C-grade garnet which is quite coarse removing paint and rust easily.

The tips wear very quickly, you would be lucky to get an hour's blasting from each. These are 3mm tips but as they wear the bore increases and pressure is lost. These are about $8 each I will have spent $100 or so in tips for the cab. The garnet is $22 for 25kg. It is largely recycled by sweeping it up and sieving it so it lasts quite a while. Blasting the cab has will probably use up 50kg.
This is my compressor. It is about as big as you can go on single phase and needs a 15A supply. It can only just keep up with blasting with a 3mm tip. As soon as the tip starts to wear you have to stop occasionally to let the compressor catch up.


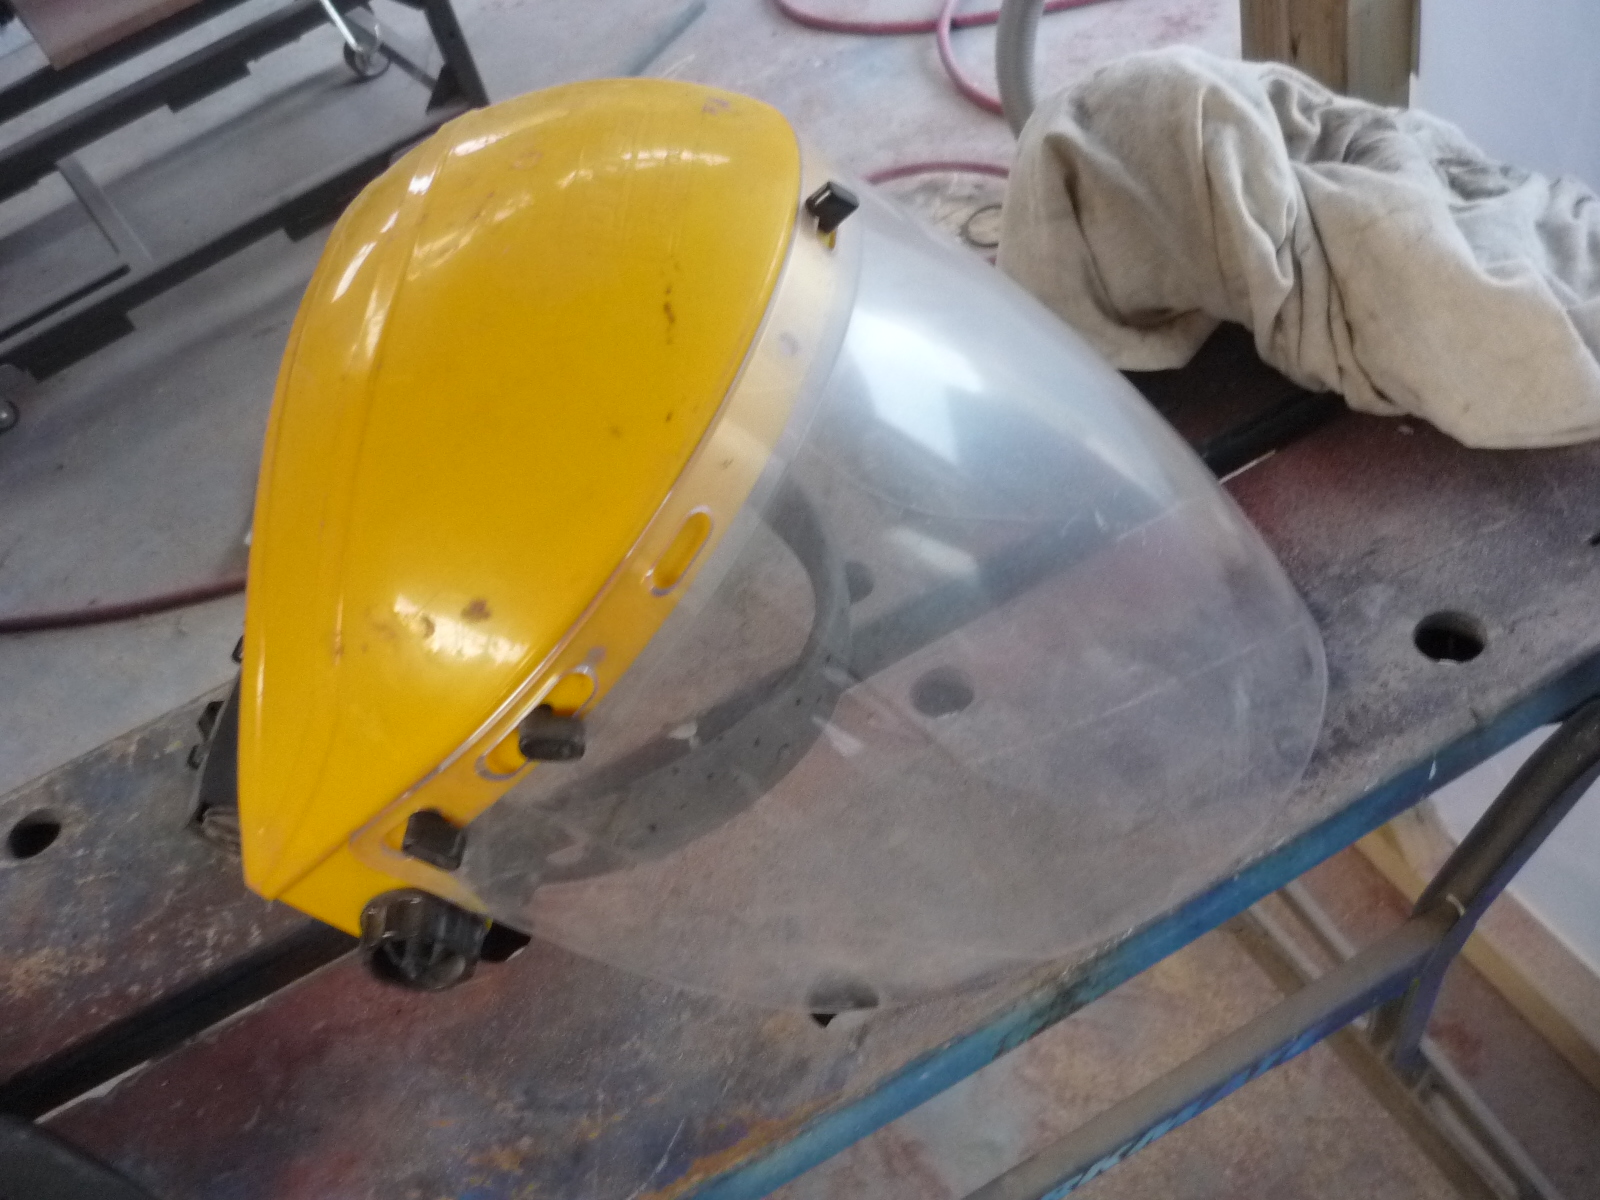
There is a sort of fabric balaclava helmet that came with the blaster and I use a dust mask and this face shield inside it. It does not work that well; the glass steams up and the sand destroys the plastic visor so that you end up working though a sort of fog.

Other kit is shown here - a dustpan for scooping the sand off the floor, an ordinary household sieve for cleaning it and a funnel with a large opening for putting it back into the pressure vessel. Front right is the dust mask which is pretty much essential through the whole process.

Compressing that much air generates a lot of water in the air lines and this in turn clogs up the sand as it flows out of the bottom of the pressure vessel which is very annoying. I'm running two water separators in the air line and they remove plenty of moisture but still not enough. 


Sunday 24 February 2013

The Rusty Floor

Since the floor was still quite pitted after blasting I gave it two coats of this stuff:


It is a moisture curing urethane. It reacts with the moisture in the atmosphere to form a very hard coating. It is a cheaper alternative to another product known as POR15 that is very popular amongst classic car restorers. The data sheet is here. You really need to read the instructions because this stuff sets like iron and if you put the lid back on the tin with paint on the lip it is sealed for good. You need disposable brushes; I picked up some from the same place that sold the paint  for a few cents each. They recommend you use the whole can at once but since this was impractical I made a temporary plastic lid with a hole to keep the top of the tin clean. When finished I resealed the can with two layers of food-wrap between the lid and the can. I guess I'll find out if that has worked next time I need it!

This stuff is quite expensive at around $65 per litre so I only painted the heavily pitted areas and the seams. After two coats it looked like this:


The coating cures very hard and very shiny. It is degraded by sunlight so for areas that may be effected it can be over coated with just about any paint. This needs to be done within 4-6 hours. If you leave it longer they recommend you rough the urethane up with some 600 grit paper.

I put on two coats during the morning and then later in the afternoon sprayed it with the two pack epoxy primer that I described in a previous post (Interbond 373).


Thursday 21 February 2013

Blasting the floor


The cab floor appeared to be the most rusty with heavy pitting but after blasting it came out surprisingly solid

On the driver's side were a few tiny pin-holes that the blasting uncovered but these are so small that I am tempted to simply paint over them. Cutting and patching the floor seems like overkill and it would be difficult to decide where to stop. I could braze up the holes but that would distort the metal work and I'm not sure I see any value.

The floor seems to be thicker steel than the rest so that although heavily pitted it is still very solid.

Wednesday 20 February 2013

Priming the underfloor

The bare metal needs priming as soon as possible because it will rust quickly. This is an International product called Interbond 373. It is a two pack epoxy primer designed to spray on bare blasted steel. It will tolerate some slight rust and pitting. I sprayed it on with a standard gravity gun and was very pleased with the result. I have no experience with spraying but it was easy to use and generated minimal mess. It comes in handy 1 litre packs and it covers very well. Here I sprayed the front of the underside and the engine bay which took less than half a litre. I wasted quite a bit because I mixed up the entire pack. It's not super expensive at just over $40 per litre.


Wednesday 13 February 2013

Let the blasting begin

With the cab in its tent I tipped it back and started blasting the underneath and engine bay. The bare cab is light enough that one person can tip it over. I guess four people could carry it.

Here is the driver's side floor after a quick pass. I later gave it another go and have since improved my technique so that I can get better results in one session.


Looking into the engine bay.

The new cab seems nice and solid so far...


Tuesday 12 February 2013

Starting the new cab

The first job was to get the cab down from where it has been lying in the woods at the back of our place, give it a wash and put it in the workshop.


Since I'm intending to grit blast and respray the cab I build a simple booth from wood and plastic to keep the sand and over spray roughly in one place.


A bit of work with a scissor jack and a rubber mallet and the dented roof popped out very well. It is on the back of the roof and is completely hidden when the body is on so I'm not too worried about it being perfect but it is certainly good enough.

Monday 11 February 2013

The First New Part


The original truck has fairly rusty bodywork and it has been welded and patched at some point. The worst rust is where the roof meets the gutter but also the doors are pretty ripe. The rust was just starting to be mentioned in COF inspections when we last used the truck. With this in mind I bought another cab a few years ago and that too has been sat in the back yard.


The roof a little dinged and a fair amount of surface rust but basically sound.

Sunday 10 February 2013

A new project begins


As my first venture into the world of blogging I thought I would try documenting the restoration of this old Bedford TK truck. This was our first horse truck and has been parked up awaiting some TLC for a few years now. It has stood out in all weathers during that time but when I put a battery on it it started immediately so there can't be too much wrong with it mechanically at any rate.

We have here a 1980 Bedford TK. Its model number is KGLC3 which I believe makes it a 300 cubic inch petrol model (4.9L) with 167" wheelbase (4.2m). Amazing that Bedford were still making petrol trucks as late as 1980. At some point it was converted to CNG (Compressed Natural Gas) and later a diesel fitted. When we bought the truck in around 2005 it came with a Bedford 466 diesel and five speed.